But is good with other versions.
******************************************************************
Materials:
aditascreations_mask_17.jpg
Alfa_Sakura.pspimage
Asian_Landscape_AI KeDe.pspimage
calguisjapon08092018.pspimage
Sakura kleuren.jpg
SakuraDeco rand.pspimage
SakuraTekst.pspimage
******************************************************************
Plugin:
Effects – plugin - Medhi - Wavy Lab 1.1
Effects – plugin - Medhi - Sorting Tiles
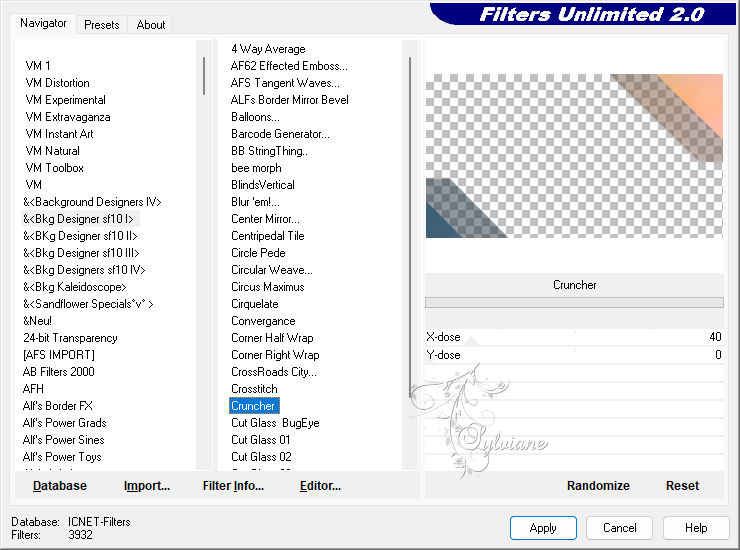
Effects – plugin - Filters Unlimited 2.0 - &<Bkg Designers sf10 I - Cruncher
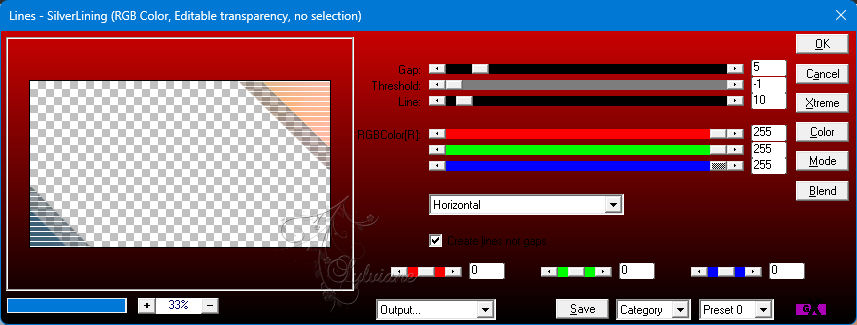
Effects – plugin - AP [Lines] Lines SilverLining - Horizontal
Effects – plugin - AP [Lines] Lines SilverLining - Dotty Grid
Effects – plugin - Nik Software - Color Efex Pro 3.0 - Brillance/Warmth
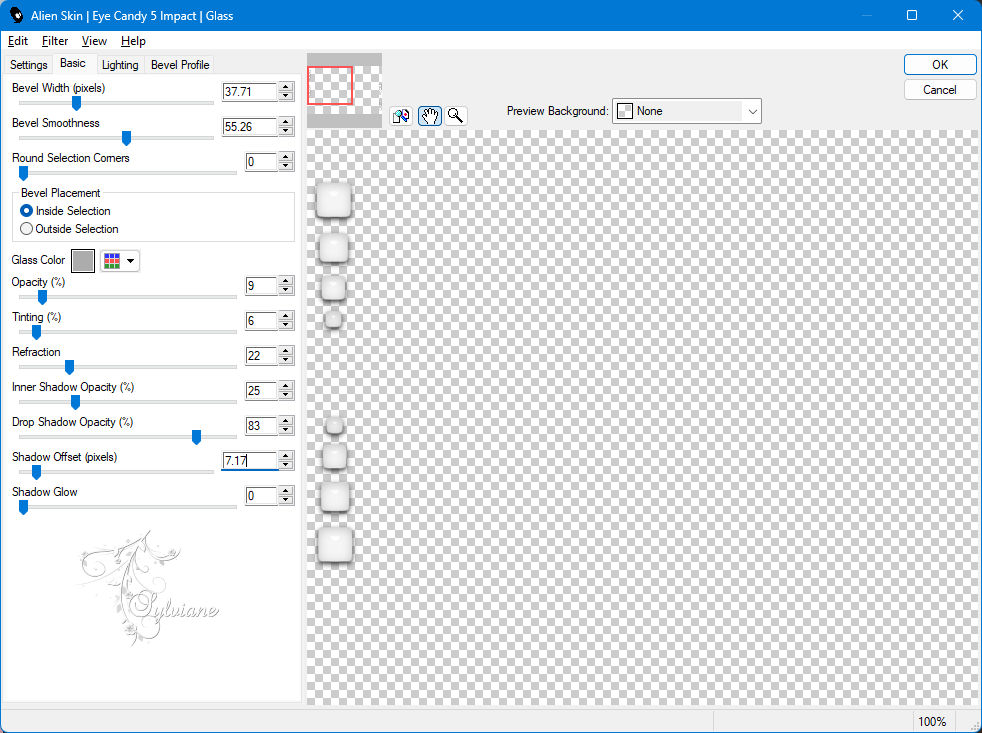
Effects – plugin - Alien Skin Eye Candy 5 - Impact - Glass
******************************************************************
color palette
:

******************************************************************
methode
When using other tubes and colors, the mixing mode and / or layer coverage may differ
******************************************************************
General Preparations:
First install your filters for your PSP!
Masks: Save to your mask folder in PSP, unless noted otherwise
Texture & Pattern: Save to your Texture Folder in PSP
Selections: Save to your folder Selections in PSP
Open your tubes in PSP
******************************************************************
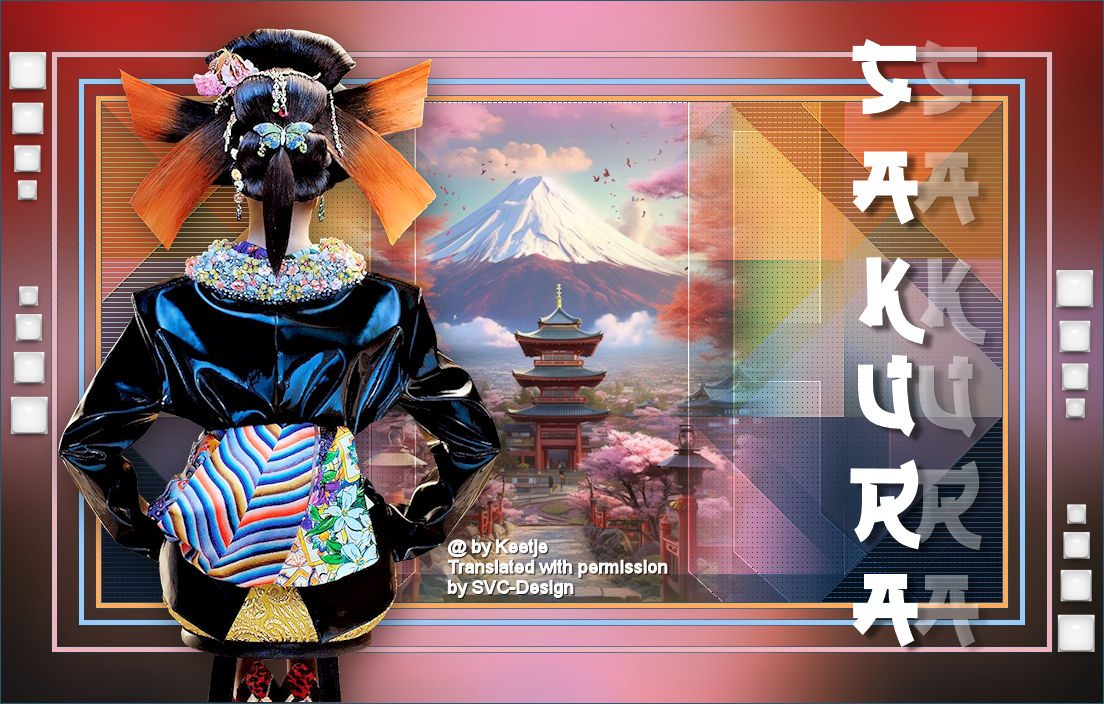
We will start - Have fun!
Remember to save your work on a regular basis
******************************************************************
1.
Open Alfa_Sakura.pspimage
Window - duplicate
Minimise the original - we are working on the copy
Effects – plugin - Medhi - Wavy Lab 1.1 - color: 1/2/3/4
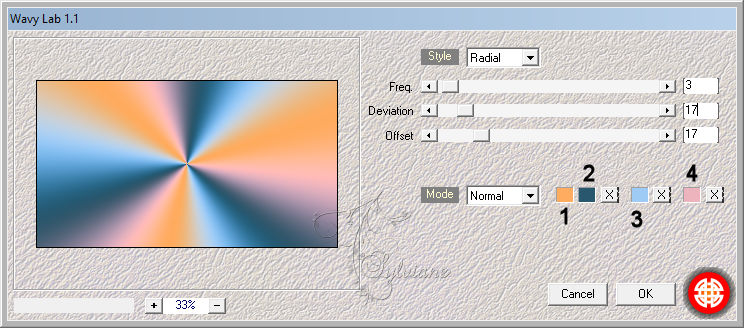
2
Effects – plugin - Medhi - Sorting Tiles
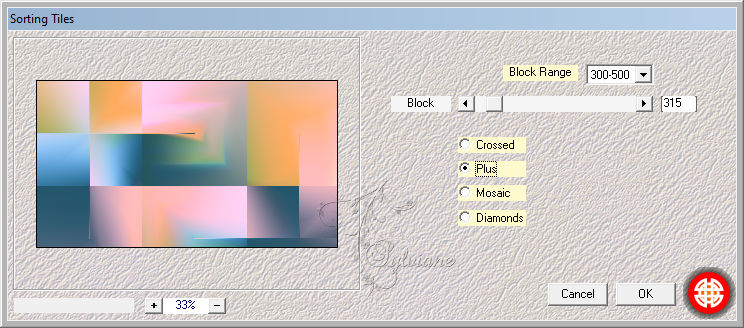
3
Layers - Duplicate
Effects – plugin Medhi - Sorting Tiles

Opacity :50%
Layers - Merge - Merge down
4
Selectie – Selectie Laden/Opslaan – Selectie Laden uit Alfakanaal - Selection 1
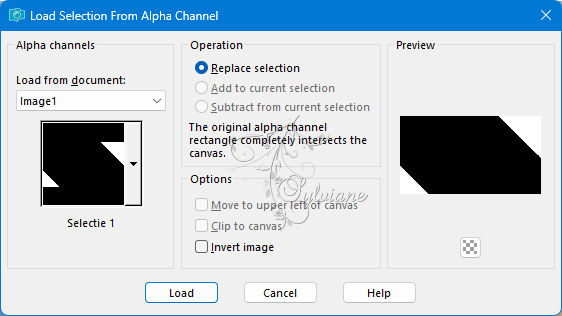
Selectie – laag maken van een selectie
5
Effects – plugin - Filters Unlimited 2.0 - &<Bkg Designers sf10 I - Cruncher
6
Effecten – randeffecten – accentueren
Selecties – niets selecteren
7
Effects – plugin - AP [Lines] Lines SilverLining - Horizontal
8
Blend mode : Multiply
Layers - Merge - Merge down
9
Layers - Duplicate
Afbeelding – Spiegelen – horizontaal spiegelen
Opacity : 55%
10
Aanpassen – scherpte – Nog Scherper
Layers - Merge - Merge down
11
Layers - Duplicate
Blend mode : Multiply
12
Layers - New raster layer
Fill with the colour # ffffff
13
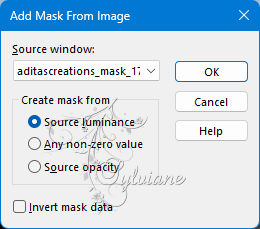
Layers - New Mask Layer - From Image - aditascreations_mask_17.jpg
Adjust – scharpness – scharpen
Layers - Duplicate
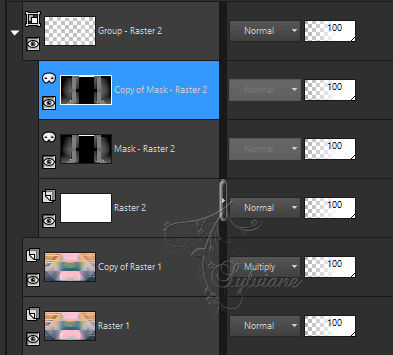
Layers - Merge - Merge group
14
Effects – plugin - AP [Lines] Lines SilverLining - Dotty Grid
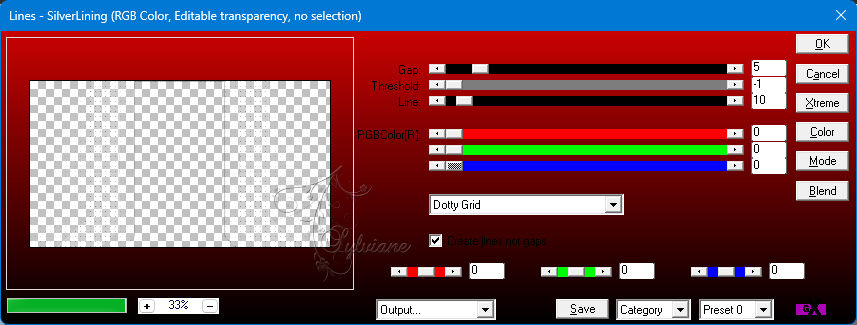
Blend Mode: Overlay
15
Activte Copy of Raster 1
Layers - Merge - Merge Down
Copy - Paste as a new image (Set aside we'll use it later)
16
Activate the work
Open Asian_Landscape_AI KeDe.pspimage
Edit – Copy
Edit - Paste as new layer
Image - Resize - Resize with 85%
No check mark on resize all layers
17
Effects - Image Effects - Offset
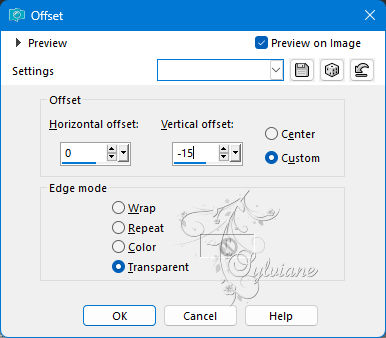
18
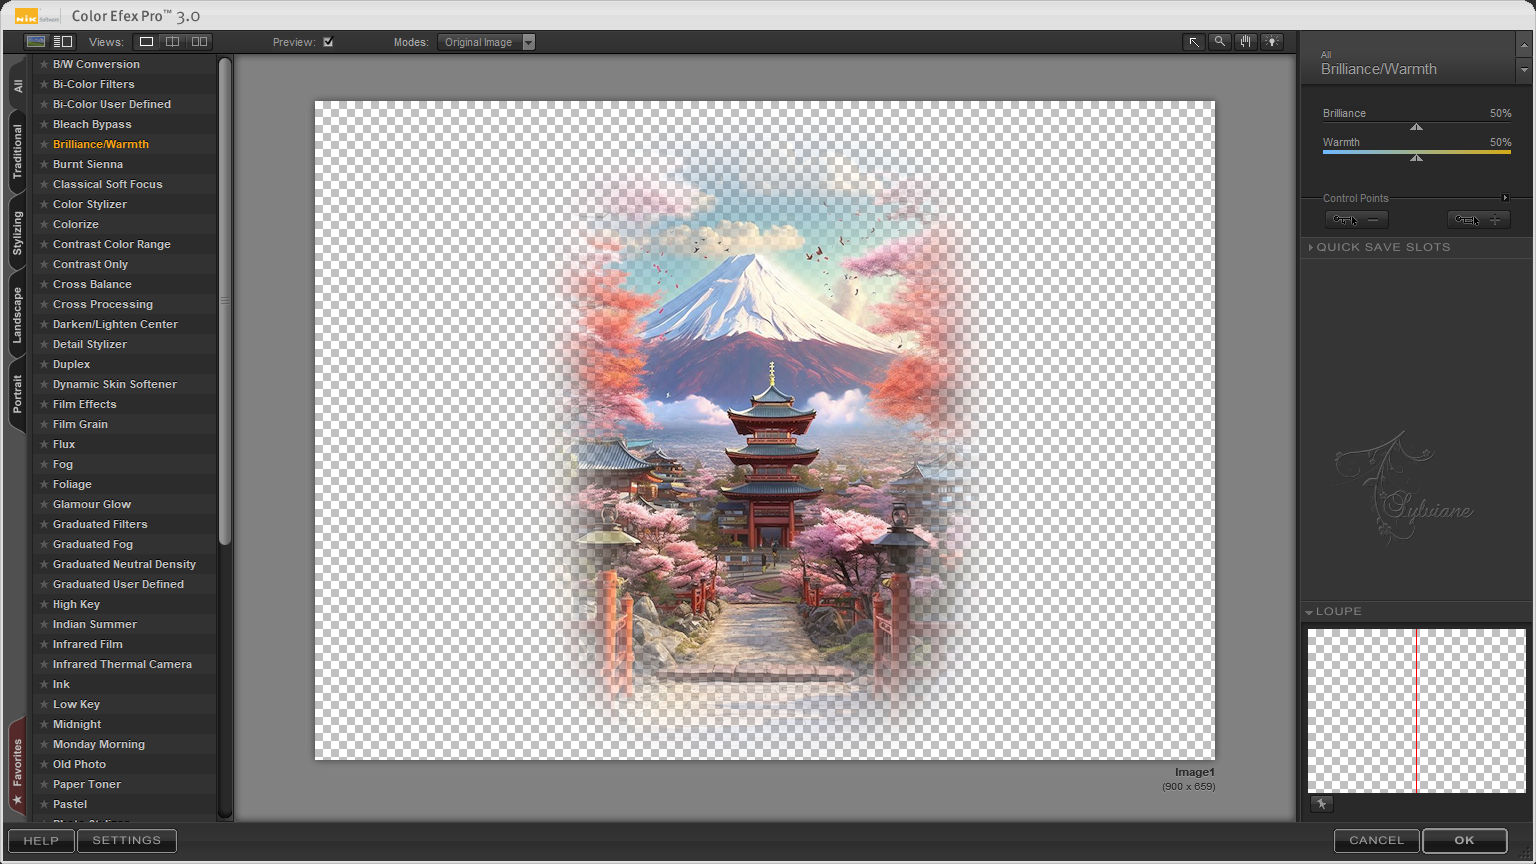
Adjust - Sharpness - Sharpen
Effects – plugin - Nik Software - Color Efex Pro 3.0 - Brillance/Warmth
19
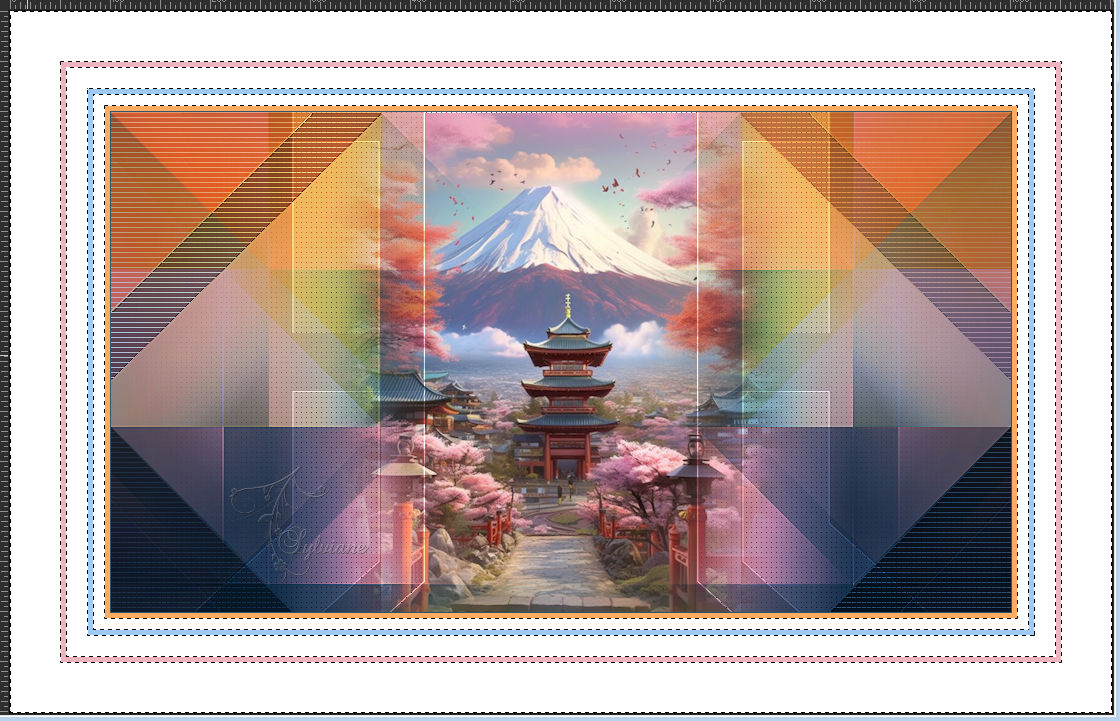
Image - Add Borders – Symmetric -1 pixel - colour 2
Image - Add Borders – Symmetric -5 pixels - colour 1
Image - Add Borders – Symmetric -1 pixel - colour 2
Image - Add Borders – Symmetric -10 pixels - colour 5
Image - Add Borders – Symmetric -1 pixel - colour 2
Image - Add Borders – Symmetric -5 pixels - colour 3
Image - Add Borders – Symmetric -1 pixel - colour 2
Image - Add Borders – Symmetric -20 pixels - colour 5
Image - Add Borders – Symmetric -1 pixel - colour 2
Image - Add Borders – Symmetric -5 pixels - colour 4
Image - Add Borders – Symmetric -1 pixel - colour 2
Image - Add Borders – Symmetric -50 pixels - colour 5
20
Activate Magic Wand Tool Feather and Tolerance 0
Select the 3 white edges
21
Activate the image from item 15
Edit – Copy
Edit - Paste into selection
22
Aanpassen – vervagen – gaussiaanse vervaging
Range :50
Selections – Promote selections to layer
Selection - Select None
23
Image - Mirror - Vertical Mirror
Blend mode: Overlay
24
Activate calguisjapon08092018.pspimage
Remove the watermark
Edit – Copy
Edit - Paste as new layer
25
Image - Resize - Resize with - 85% (3x)
No check mark on resize all layers
Adjust - Sharpness - Sharpen
26
Move to the left
Effects - 3D Effects - Drop shadow of your choice
27
Activate SakuraTekst.pspimage
Edit – Copy
Edit - Paste as new layer
If you want, you can colour it with a colour from your tube
Place on the right side
Effects - 3D Effects - Drop shadow
5 / 8 / 50 / 6 / colour #000000
28
Layers - Merge - Merge visible layers
29
Open SakuraDeco rand.pspimage
Edit – Copy
Edit - Paste as new layer
You can fill them with a colour from your tube if you like
30
Selection - Select All
Selections – float
Selections – defloat
31
Selections - modify - contract -1 pixel
Selections – Promote selections to layer
Fill with a colour from your work or leave it white
Selection - Select None
32
Effects – plugin - Alien Skin Eye Candy 5 - Impact - Glass
33
Place your Name/Watermark
Image - Add Borders – Symmetric -1 pixel - colour 2
34
Image - Resize - Change width to 1000 pixels
Save as Jpeg
Back
Copyright Translation 2024 by SvC-Design
------------------------------------------------------------------------------
Thanks to all who created